[Get the best value jump rings on Amazon today!]
# The Ultimate Guide to Jump Rings: Everything You Need to Know
Jump rings are the unsung heroes of jewelry making. These tiny, versatile circles of metal connect your creations, allowing you to bring together beads, charms, and other components into stunning necklaces, bracelets, earrings, and more. But with so many sizes, materials, and types available, choosing the right jump rings can feel overwhelming. Don’t worry! This ultimate guide will walk you through everything you need to know about jump rings, from selecting the perfect size and gauge to mastering opening and closing techniques.
[Browse top-rated jump rings on Amazon]
## What Are Jump Rings, and Why Are They Important?
Jump rings are essentially small, open loops of wire that are used to connect jewelry components. They act as links, allowing you to attach clasps to necklaces, hang charms from bracelets, or create intricate patterns in chainmaille. Their importance lies in their versatility and ability to create secure and aesthetically pleasing connections in jewelry design.
Think of them as the glue that holds your jewelry projects together. Without properly selected and used jump rings, your beautiful creations could easily fall apart or look unprofessional.
[Browse top-rated jump rings on Amazon]
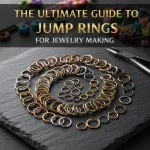
## Types of Jump Rings
Understanding the different types of jump rings is crucial for choosing the right ones for your projects. Here’s a breakdown of the most common types:
* **Round Jump Rings:** The most basic and widely used type. They’re versatile and suitable for a wide range of projects.
* **Oval Jump Rings:** Offer a slightly different aesthetic than round jump rings. They can add a unique touch to your designs.
* **Split Rings:** Similar to key rings, split rings provide extra security and are great for attaching charms or pendants that you don’t want to risk losing. They are much stronger than regular jump rings.
* **Soldered Jump Rings:** These rings are permanently closed with solder, making them the strongest and most secure option. They’re ideal for high-stress areas or valuable pieces.
* **Double Jump Rings:** These are essentially two jump rings interlocked, providing extra strength and preventing the rings from pulling open easily.
[Browse top-rated jump rings on Amazon]
## Choosing the Right Size of Jump Rings
The size of a jump ring is determined by its outer diameter (OD), typically measured in millimeters. Choosing the right size depends on the components you’re connecting and the desired look of your piece.
* **Small Jump Rings (3mm-4mm):** Ideal for delicate pieces, connecting small beads, or creating intricate details.
* **Medium Jump Rings (5mm-7mm):** Versatile size suitable for a wide range of projects, including attaching clasps and connecting larger beads.
* **Large Jump Rings (8mm+):** Best for heavier pieces, attaching large pendants, or creating bold design elements.
**Pro Tip:** When in doubt, it’s often better to go slightly larger than smaller. A jump ring that’s too small can be difficult to work with and may not provide a secure connection.
[Browse top-rated jump rings on Amazon]
## Understanding Jump Ring Gauge
Gauge refers to the thickness of the wire used to make the jump ring. The lower the gauge number, the thicker the wire. Choosing the right gauge is essential for ensuring the strength and durability of your jewelry.
* **Thin Gauge (20-22 Gauge):** Suitable for lightweight pieces and delicate designs. Easier to open and close but less strong.
* **Medium Gauge (18-20 Gauge):** A good balance of strength and workability, suitable for most general jewelry making.
* **Thick Gauge (16 Gauge and Lower):** Ideal for heavy pieces, high-stress areas, or projects where durability is paramount. More difficult to open and close but very strong.
**Key Considerations When Choosing Gauge:**
* **Weight of Components:** Heavier beads or pendants require thicker gauge jump rings.
* **Wear and Tear:** Pieces that will be worn frequently or subjected to stress should use thicker gauge jump rings.
* **Aesthetic Preference:** Thicker gauge jump rings can create a more substantial look.
[Browse top-rated jump rings on Amazon]
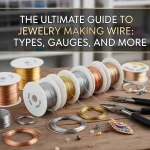
## Materials: Choosing the Right Metal for Your Jump Rings
Jump rings are available in a variety of metals, each with its own unique properties and aesthetic. Here are some of the most common materials:
* **Sterling Silver:** A popular choice for its beauty, durability, and affordability. Requires occasional polishing to prevent tarnishing.
* **Gold-Filled:** A layer of gold bonded to a base metal, offering the look of gold at a more affordable price. Tarnish-resistant and durable.
* **Gold Plated:** A thin layer of gold electroplated onto a base metal. Less durable than gold-filled and may tarnish over time.
* **Copper:** A warm, reddish metal that can add a unique touch to your designs. Can tarnish easily but can be treated to prevent it.
* **Brass:** A golden-colored alloy of copper and zinc. Affordable and durable, but may tarnish over time.
* **Stainless Steel:** A strong, durable, and tarnish-resistant option. Ideal for pieces that will be worn frequently or in harsh conditions.
* **Base Metals (e.g., Nickel, Pewter):** Affordable options but may cause allergic reactions in some people. Often plated with other metals for aesthetic appeal.
**Matching Metals:** It’s generally best to match the metal of your jump rings to the other components in your jewelry piece to create a cohesive look.
[Browse top-rated jump rings on Amazon]
## Essential Tools for Working with Jump Rings
Having the right tools makes working with jump rings much easier and more efficient. Here are some essential tools to have in your jewelry-making toolkit:
* **Chain Nose Pliers:** Used for opening and closing jump rings smoothly and securely. The flat, smooth jaws prevent scratching the metal.
* **Round Nose Pliers:** Used for creating loops and curves in wire, including jump rings if you want to make your own.
* **Bent Nose Pliers:** Similar to chain nose pliers but with a bent tip, making them ideal for working in tight spaces.
* **Jump Ring Opener/Closer Tool:** A specialized tool designed to make opening and closing jump rings quick and easy, especially for small sizes.
### Product Recommendation: Wubbers Pliers
The Wubbers brand offers high-quality pliers specifically designed for jewelry making. Their ergonomic handles and precise jaws make them a favorite among jewelry artists. Their chain nose pliers are particularly excellent for working with jump rings of all sizes.
**Key Features of Wubbers Pliers:**
* **Ergonomic Handles:** Comfortable to hold for extended periods.
* **Precise Jaws:** Provide a secure grip and prevent scratching.
* **Durable Construction:** Built to last.
These pliers can significantly improve your jump ring handling skills and overall jewelry-making experience.
[Browse top-rated jump rings on Amazon]
## How to Open and Close Jump Rings Properly
Opening and closing jump rings correctly is crucial for creating strong and secure connections. The key is to open and close them *sideways*, not by pulling them apart.
**Step-by-Step Guide:**
1. **Grip the Jump Ring:** Use two pairs of pliers, one in each hand. Grip each side of the jump ring, positioning the opening at the top.
2. **Open the Jump Ring:** Gently pull one side of the jump ring forward and the other side backward, creating a small gap. *Avoid pulling the ends directly apart.*
3. **Attach Components:** Slide the components you want to connect onto the open jump ring.
4. **Close the Jump Ring:** Use the pliers to gently push one side of the jump ring forward and the other side backward, bringing the ends back together. Ensure the ends meet flush and there is no gap.
**Common Mistakes to Avoid:**
* **Pulling the Ends Apart:** This weakens the metal and can distort the shape of the jump ring.
* **Overlapping the Ends:** This creates a weak connection and can look unprofessional.
* **Scratching the Metal:** Use pliers with smooth jaws to prevent scratching.
### Pro Tip: Use a Magnifying Glass
For working with very small jump rings, a magnifying glass or visor can be extremely helpful for seeing the details and ensuring a secure closure.
[Browse top-rated jump rings on Amazon]
## When to Use Soldered Jump Rings
Soldered jump rings offer the ultimate in security and are ideal for situations where strength is paramount. Consider using soldered jump rings:
* **For High-Stress Areas:** Such as the connection between a clasp and a necklace.
* **For Valuable Pieces:** To prevent loss of expensive beads or pendants.
* **For Pieces That Will Be Worn Frequently:** To ensure durability and longevity.
Soldering jump rings requires specialized equipment and skills. If you’re not comfortable soldering yourself, you can purchase pre-soldered jump rings or have a jeweler solder them for you.
[Browse top-rated jump rings on Amazon]
## Jump Ring Alternatives: Wire Wrapping and Head Pins
While jump rings are a staple in jewelry making, there are alternative methods for connecting components, such as wire wrapping and head pins.
* **Wire Wrapping:** Involves using wire to create loops and wraps around components, creating a secure and decorative connection.
* **Head Pins:** Wires with a head on one end, used to string beads and create loops for attaching to other components.
These alternatives can add unique textures and design elements to your jewelry.
[Browse top-rated jump rings on Amazon]
## Storing Your Jump Rings
Properly storing your jump rings will keep them organized and prevent them from getting tangled or damaged. Here are some storage tips:
* **Use Small Compartment Boxes:** These boxes keep different sizes and materials separate.
* **Label Your Compartments:** Clearly label each compartment with the size, gauge, and material of the jump rings
[Check the latest prices and deals for jump rings on Amazon today!]